Skip to main navigation Skip to content
Please enter a search term

The secrets behind slow cooking for kids

Like what you see?

Sign up to receive more free parenting advice.

Paulene Christie

Credit: Karlie Holloway

Using a humble slow cooker, Queensland mum Paulene Christie has traded her busy life juggling parenting and full-time work as a psychiatric nurse, to lead half a million passionate online followers.

Managing meals for her husband and three children while on shift work, Paulene started using a slow cooker to prepare meals that would be ready for the family at the end of the day.

In 2012 she started a Facebook group for like-minded people and today Slow Cooker Recipes 4 Families has 526,000 members.

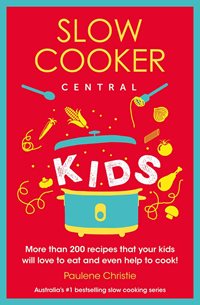
The author of a number of slow cooker recipe books, Paulene has just released another in the series Slow Cooker Central aimed specifically at catering for children.

Slow Cooker Central Kids has 200 recipes road-tested by families from the Slow Cooker Recipes 4 Families Facebook page  and Slow Cooker Central website.

Paulene says she was initially drawn to slow cooking by the convenience.

“Like so many parents I was struggling through those dinner hours every night,” Paulene says.

“Tired kids, and as parents we were exhausted too, with after school activities, homework time, bath time etc, so the lure of having dinner all ready to literally just serve was very appealing to me. 

“Once I started, it saved me so much time and money that I was quickly hooked.”

Paulene says she believes the community has grown because other parents agree that it saves time and money.

She says the machines are affordable, and many people already own one.

“It's a classic appliance that has stood the test of time.  It saves money on grocery bills as you can cook with cheaper cuts of meat and every day ingredients. 

It saves on impulse take away buys at that busy time of night when it's easy to be tempted by convenience. 

“And we are showing people that slow cookers are so much more than the traditional soups, stews and silversides. 

“We do everything from pasta, to lasagne, to cakes, to international cuisines, to desserts, to baking, to lunchbox snacks and so much more.”

When kids are involved in cooking they are far more likely to also be keen to eat what they help create so there’s far less food refusal come dinner time.
Paulene Christie

Paulene says one of the additional benefits is that with slow cooking the kids can help you cook.

“No boiling water, spitting fat or hot oil to contend with, so even from a very early age of just a few years old your children can start learning to cook and prepare healthy home cooked food,” she says.

“My children love being involved in my slow cooking.  My youngest who is not yet five can still find plenty of ways to help. 

“I will do any cutting or peeling for her first, but she loves adding things to the cooking pot, stirring liquids together, pouring ingredients in, helping to measure and spoon, and of course turning it on and checking in on it during the day.

“When kids are involved in cooking they are far more likely to also be keen to eat what they help create so there’s far less food refusal come dinner time.”

Slow Cooker Central also has a dedicated craft section with recipes so children can make play dough, slime, finger paints, crayons, candles, hand and foot moulds and more.

“Another option is to use your slow cooker as a vaporiser for sick kids during flu season,” Paulene says.

Paulene says there are a range of questions she repeatedly gets from parents that are addressed in the book.

Three of the most common are whether you can go out and leave a slow cooker on, whether you need to pre-brown meat before cooking, and whether it’s more economical to run a slow-cooker or an oven.

Can I go out and leave my slow cooker on?

“In short … yes – with precautions. Slow cookers are designed to run all day unattended without posing a fire hazard. There are however some measures you can take to improve the safety of doing so. I always place my slow cookers on top of my ceramic cooktop/hotplates. This surface is designed to withstand high temperatures after all. Just be sure never to accidentally have a hotplate turned on (I lost my first ever slow cooker to this happening when I melted its legs off!). If you don’t have this option placing it on a glass top trivet or cutting board works in a similar way.”

  • Ensure flammable objects are not left touching or too near the slow cooker.
  • Move the slow cooker away from the wall and any curtains etc.
  • Always have a working smoke alarm and electrical safety switch in your home so that if you are home and the worst were to somehow happen you and your family can be alerted to the danger and/or the electricity supply will cease to the unit.

Do I need to pre-brown, pre-cook or seal my meat prior to placing it in the slow cooker?

“No you don't have to - but may like to. Some people like to do this step to add more depth of flavour (in their opinion) to the dish or to seal in juices. It can also be helpful to liquify fat from the meat which can then be discarded prior to adding the meat to the slow cooker.
However it does add another step in the preparation of your dish. So totally your choice but for what it’s worth – I hardly ever pre brown or pre seal.”

Doesn't it cost a lot more to run a slow cooker for 8hrs than an oven for 1hr?

“It's actually much cheaper. Of course there are many variables to consider including the size and model of your slow cooker and size and efficiency of your wall oven but overall the stats are well in favour of your slow cooker being the cheaper way to cook. Even if it is over 8hrs instead of 1hr. Energy provider Ergon Energy advises that a slow cooker costs 4c per hour, while and an oven costs 60c per hour. So running your slow cooker for 8hrs will cost 32c compared to 60c for just one hour of the oven (and that doesn’t even account for oven pre-heating time). Bargain!”

Paulene’s Top 5 Slow Cooker Tips

  • It's okay to use cheap cuts of meat. Save money, but still have great tender results.
  • Never slow cook using frozen meat. Always defrost first.
  • Don't be scared to try new things. There is almost nothing we cannot do in our slow cookers.
  • Any meal type base packet or jar is also okay in the slow cooker - it doesn't have to be a slow cooker specific kind. This is often an easier way for many who are new to slow cooking and unsure where to start to begin, until you get more confident to try more of our recipes from scratch and get more adventurous.
  • Don't add too much water to recipes, if any. The slow cooker makes much of its own cooking juices due to condensation from the lid. Roasts etc can start with no liquid at all. For regular oven type recipes you want to try in the slow cooker, reduce the liquids added down by at least 1/3 when converting them to slow cooking.

Slow Cooker Play Dough

The texture of this play dough is silky smooth and non-greasy.

Makes 1kg. Preparation time 10 mins. Cooks 45-60 mins. Cooker capacity 5 litres.

Ingredients:

  • 2 cups plain (all-purpose flour)
  • ½ cup salt
  • 1/3 cup cream of tartar
  • 2 tablespoons vegetable oil
  • 1-2 teaspoons liquid food colouring

Method:

  1. In a bowl combine the flour, salt and cream of tartar. In a separate bowl, combine the oil and 2 cups of water.
  2. Put the dry ingredients into a slow cooker, add the wet ingredients and mix to combine.
  3. Cover, putting a tea towel (dish towel) under the lid, and cook on HIGH for 45-60 minutes, stirring often for the first 30 minutes of cooking time, and then once or twice for the remaining cooking time.
  4. The dough is ready when it no longer sticks to the sides of the slow cooker. You can test this by rolling a small amount of dough into a ball and placing it in the freezer for a few minutes. If the dough doesn’t stick to your fingers when you remove it from the freezer it is ready.
  5. Remove the dough from the slow cooker, knead until smooth and set aside in an airtight container in the fridge to cool.
  6. Divide the play dough into four equal pieces and add food colouring a few drops at a time to each piece, kneading thoroughly to mix. Keep adding and kneading until the play dough is the colour you want.
  7. Store the play dough in the fridge.